Welcome back to the second part of the Bloodsail Ogres faction focus! This one is coming a little late, as yesterday had me rather busy with work (sorry everyone), but we are going to be getting into the real technical aspects of running the army today. Feel free to comment on the post and let me know what you think of these faction focus articles, and let me know what you want to see next!
Deployment Strategy
If you haven't read the first faction focus article for the Ogres, I strongly suggest you pause here and go read that first, otherwise some of what is to come may seem a little confusing. Deployment with the Ogres in my opinion is where the game will either be won or lost. Obviously each game will be different, and you will need to keep [your opponent's units in mind when deciding how you want to approach the deployment phase; however, the deployment strategy can follow the following scheme closely in most situations.
As a castle style army, the goal of our deployment is going to be attempting to accomplish a few crucial points to help us control the game:
1. Is there a piece of passable terrain that we can use to score two objectives?
2. How can we score presence utilizing the terrain piece or without the terrain piece?
3. How swiftly can I get to El Dorado to begin securing the objective?
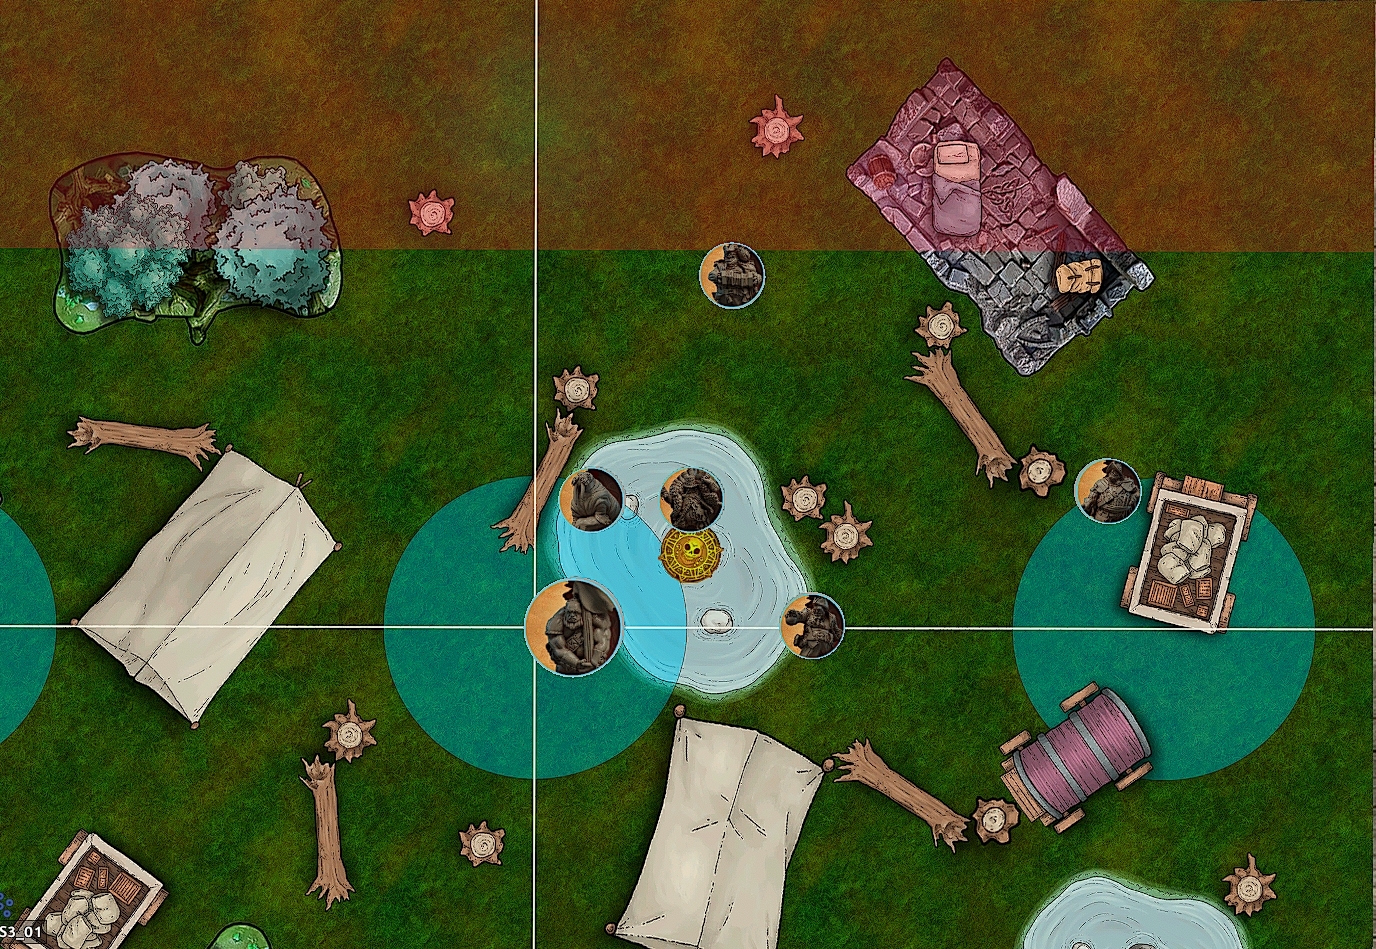
Here is a deployment example using the first scenario from this season's tournament pack.
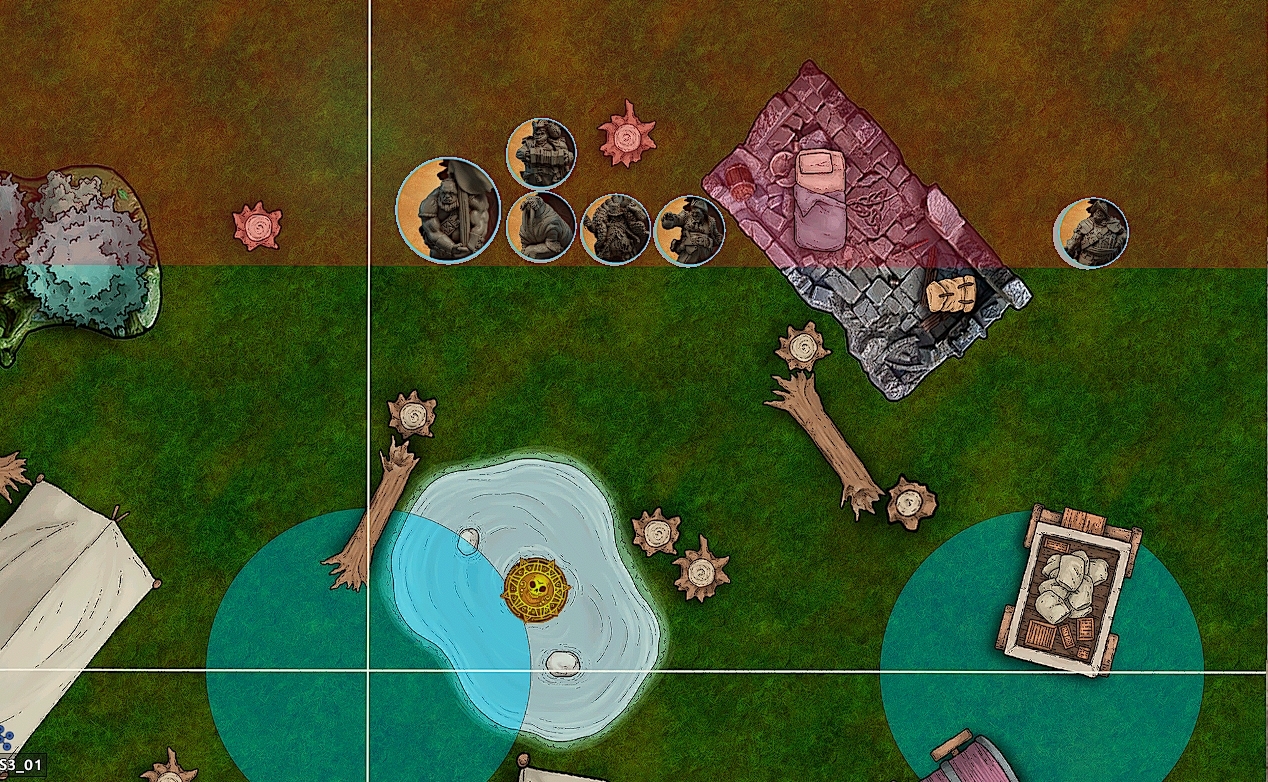
Scenario 1: This season's maps don't really have any terrain features covering two objectives, but we can still make this work in our favor. If you get to choose sides, I would definitely pick the side closest to the swamp. This will allow for one objective capture, and the possibility of small presence (or big presence if you wanted to get a little more risky with your units). You should be able to make it to El Dorado by the end of turn one to benefit from your positioning. Rodrigo is one of the few units that can go off on his own without support. You will be losing a little firepower in El Dorado, but he can easily still poke from our second objective while his teammates cover him from El Dorado. Now lets move on to our first turn and discuss setup for the rest of the game.
Early Game Setup and Strategy
The first turn for the Ogres, as with many factions, is going to be about setup and securing our positioning on the map. The Ogres having ranged attacks though can EASILY start dishing out damage and controlling the opponents moves in the first turn. Using our deployment example above, let's get our early game setup accomplished and set ourselves up for success.
The moves I made in order were the following:
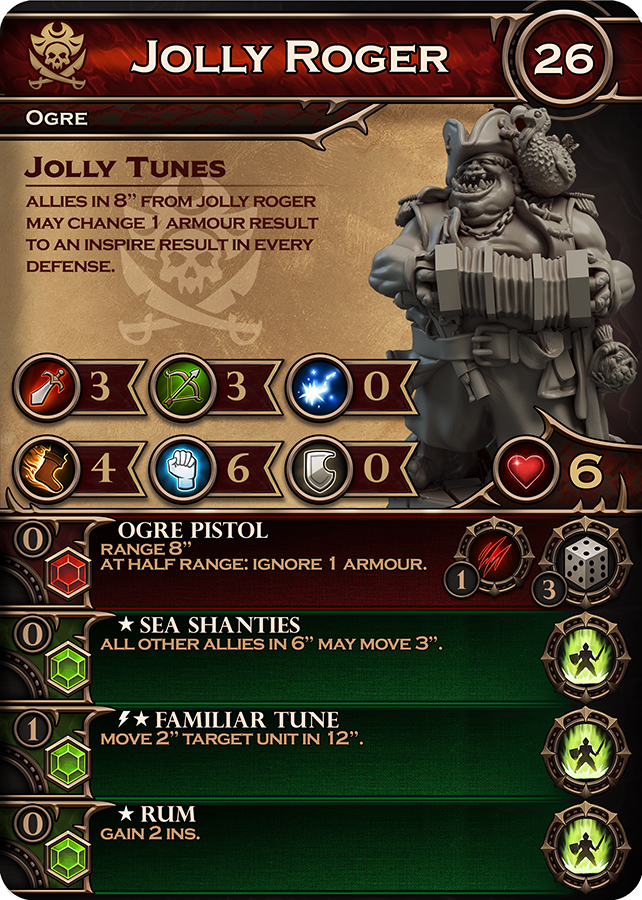
1. Used Jolly Roger to move all my units forward 3" (including Rodrigo because we kept him in our 6" bubble).
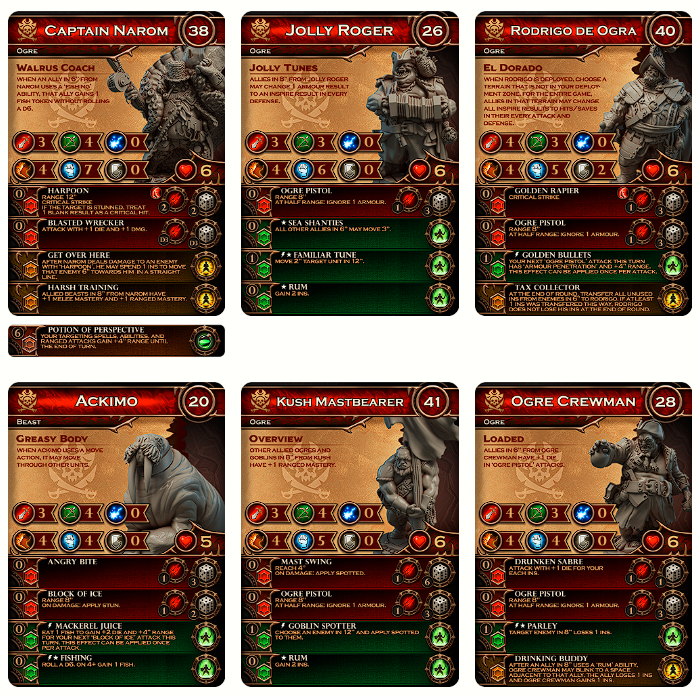
2. Activated Ackimo, moving into El Dorado and setting up for the possibility of an early stun (don't forget to fish while close to Narom). If the possibility to get an attack off isn't available, we can take a battle prep action for an extra inspiration. At this point, Ackimo has already begun to threaten the opposing player's side of the map from a relatively safe location.
3. Double movement action for Kush the Mastbearer. This will get him into position to tank some of the incoming damage and threaten a melee attack that could apply spotted. He is also helping us to begin getting points for presence.
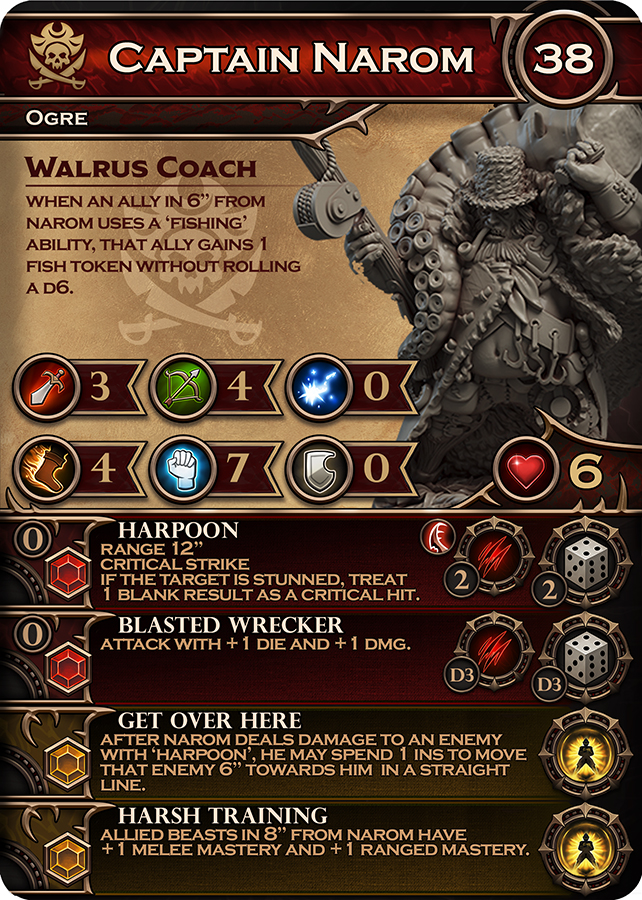
4. Narom moves into El Dorado in order to begin covering both objectives with his harpoon shot. Take an attack action if the opportunity is available at this point, especially if Ackimo was able to pull off a stun. This could be an early first blood for you.
5. Double move the Ogre Crewman so that he can also be in El Dorado and provide his buff to Rodrigo on the second objective. This will also secure our small presence we setup earlier.
6. Lastly, move Rodrigo onto the second objective. He won't be in range of the Crewman's buff initially, but at this point you can elect to take a second move action to get the buff or make an attack on a threatening model.
Obviously, this is in a perfect world and will depend on what the opponent does as well, but hopefully you get the idea of what we are trying to accomplish in our first turn and beyond. Keep your castle together, pick your targets and get the kills. The following turns will consist of setting up kills with Ackimo and Narom, as well as defending El Dorado using ranged attacks and Kush's melee capabilities. Focus on one target at a time, as with the amount of healing some factions have you could be outpaced if proper focus fire isn't achieved.
Countering the Ogres
The last part of this faction focus is going to be for the non-Ogre players, looking into how to counter their strategy and pick up a win against them. They have a few key weaknesses that can be exploited, and when they are, you can seriously hinder an Ogre player and keep them from playing the game in a sense.
The first way to counter them, and honestly the simplest way, is to beat them IN DEPLOYMENT. In the example I showed above, if you prevent the Ogres from picking a side closest to a terrain piece near the center, they will have a much harder time attempting to get to El Dorado and could be delayed by a turn. If played correctly, you can score a first blood before they do and focus on killing a key piece in their force before it gets to El Dorado. Ogre's can be extremely fragile and susceptible to focused fire if not in El Dorado. If they are forced to set up El Dorado on the outside edge of the map instead, they will miss out on controlling the center, presence points and being able to utilize their range effectively. So think about deployment, and how to stop them from getting to El Dorado (or at least delaying it).
The second way to counter Ogres is to bring models with high amounts of attack dice. The Ogre passive ability only applies to attacks that deal more than one damage per hit, therefore high amounts of attack dice can deal much more damage than a high damage attack with low attack dice. The Lord of Fury is a fantastic example of having high amounts of attack dice capable of dealing with Ogres.
The last way to counter Ogres that I have found is to either stun lock their units utilizing Voltaris or another source of stun to limit the amount of actions they can perform or utilize push mechanics to clear them out of El Dorado. The latter is going to be the best option, but you will have to manage your activations and pay attention to which units have already activated for the Ogres, otherwise they will just move back in before you get the chance to pick your target off.
I hope you guys have enjoyed the last two articles on the Bloodsail Ogres. I'm excited to continue reading providing Bloodfields blog content, and possibly some video content in the future to go alongside this. Comment which factions you want to see next, or what topics you would like me to cover in the future. Any feedback is appreciated! Stay tuned for a unit review of the newly released Vampire Hunters and possible tactics. See you next time!